Amish Cooking Class Cookbook by Wanda E. Brunstetter

CookingClassCookbookbyBrunstetter

This is a cookbook that will hit the comfort food spot in your soul!  It is homey, practical and very family friendly.  It is loaded with everything from desserts, beverages, canning, mains and sides, cooking with children and more.  Just take a look at the table of contents…

dsc04735.jpg

This a beautifully photographed book with a variety of vignette pages about life in the Amish community.  This book is intended to go with the Amish Cooking Class series post I shared with you all earlier in February.

CookingClassCollage

I decided to test run some recipes for you from the book before sharing with you.  I tried four recipes on my family this past week and they loved every single one of them.  I made a sweet and sour meatloaf straight from the fictional character’s kitchen in the books.  It is called Heidi’s Sweet and Sour Meat Loaf (pg. 120)  It is super easy to make and has amazing flavor.  My meat eating bunch barely left me enough to get a photo for you.

DSC04716

Baked Stuffed Tomatoes (pg. 113)… look at that gorgeous photo in the book!

DSC04687

I did not add the crumbs on top like the photo but they were absolutely delicious with bacon and bell pepper in the inside filling.  This would be a summer garden bounty treat!

DSC04715

Squash Croquettes… found on page 173

DSC04692

and two loaves of Banana Bread (pg 39)… the book has a lovely photo of the bread opposite the recipe.  I am telling you, this book is beautiful!  I also love that it lays flat with the spiral binding.

DSC04722

You will notice that my banana bread sunk in the middle and I had to cook it for about 20 minutes longer than the recipe said to cook it.  The issue was not in the recipe but in my altitude.  I am at 4,000 ft above sea level and I should have reduced the amount of oil and added to the cooking time as I usually do but I decided to test it as it was first.  My next attempt will be with the adjustments for altitude.  It was still fantastic and the second loaf got shipped off to my girl at college.  She won’t mind that it sunk either.

DSC04726

This is such a great cookbook for the homesteader in you!  I give it a 5 out of 5 stars and will continue to try new recipes from this book for a long time to come.

I received a complimentary copy of this book from Barbour Publishing and was under no obligation to post a review.


Christmas Past: Yule Log 2007

This was from 2007… I was a member of the Daring Baker’s group online at the time.  I believe they have since closed their site but this was such a fun project.  Everything you need to make your own is here and the recipe came directly from the Daring Baker’s blogger hosts.  It is certainly not one I came up with.  LOL

Enjoy!

Well, at least my family loved it!!! LOL

Ok, so that was bad! LOL I have been out of commission for two months due to pending surgery but I had the surgery and have been in the kitchen today taxing myself a bit but it was for a very good cause. We have our annual Christmas party at church tomorrow night and I decided this little cake would fit the bill for my contribution.


Here is what I did…

I made the Genoise Cake

Plain Genoise:


3 large eggs
3 large egg yolks
pinch of salt
¾ cup of sugar
½ cup cake flour – spoon flour into dry-measure cup and level off (also known as cake & pastry flour)
¼ cup cornstarch

one 10 x 15 inch jelly-roll pan that has been buttered and lined with parchment paper and then buttered again

1. Set a rack in the middle of the oven and preheat to 400 degrees F.

2. Half-fill a medium saucepan with water and bring it to a boil over high heat. Lower the heat so the water is simmering.

3. Whisk the eggs, egg yolks, salt and sugar together in the bowl of a heavy-duty mixer. Place over the pan of simmering water and whisk gently until the mixture is just lukewarm, about 100 degrees if you have a thermometer (or test with your finger – it should be warm to the touch).

4. Attach the bowl to the mixer and, with the whisk attachment, whip on medium-high speed until the egg mixture is cooled (touch the outside of the bowl to tell) and tripled in volume. The egg foam will be thick and will form a slowly dissolving ribbon falling back onto the bowl of whipped eggs when the whisk is lifted.

5. While the eggs are whipping, stir together the flour and cornstarch.

6. Sift one-third of the flour mixture over the beaten eggs. Use a rubber spatula to fold in the flour mixture, making sure to scrape all the way to the bottom of the bowl on every pass through the batter to prevent the flour mixture from accumulating there and making lumps. Repeat with another third of the flour mixture and finally with the remainder.

7. Scrape the batter into the prepared pan and smooth the top.

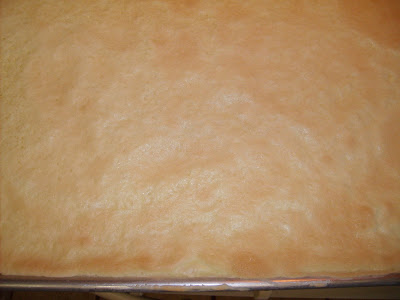
8. Bake the genoise for about 10 to 12 minutes. Make sure the cake doesn’t overbake and become too dry or it will not roll properly.
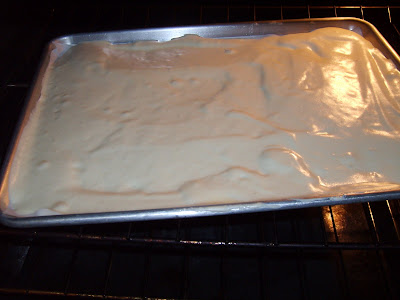
9. While the cake is baking, begin making the buttercream.

10. Once the cake is done (a tester will come out clean and if you press the cake lightly it will spring back), remove it from the oven and let it cool on a rack.
Coffee Buttercream:

4 large egg whites
1 cup sugar
24 tablespoons (3 sticks or 1-1/2 cups) unsalted butter, softened
2 tablespoons instant espresso powder
2 tablespoons rum or brandy

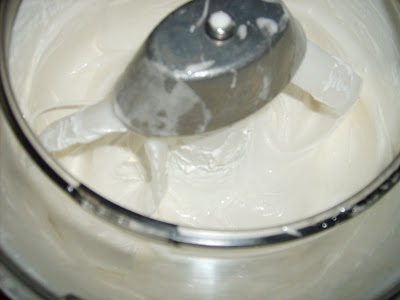
1. Whisk the egg whites and sugar together in the bowl of an electric mixer. Set the bowl over simmering water and whisk gently until the sugar is dissolved and the egg whites are hot.

2. Attach the bowl to the mixer and whip with the whisk on medium speed until cooled. Switch to the paddle and beat in the softened butter and continue beating until the buttercream is smooth. Dissolve the instant coffee in the liquor and beat into the buttercream.

Filling and frosting the log:

1. Run a sharp knife around the edges of the genoise to loosen it from the pan.

2. Turn the genoise layer over (unmolding it from the sheet pan onto a flat surface) and peel away the paper.
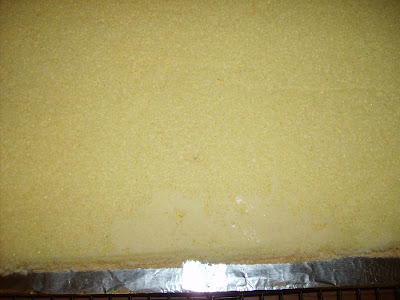

3. Carefully invert your genoise onto a fresh piece of parchment paper.

4. Spread with half the coffee buttercream (or whatever filling you’re using).
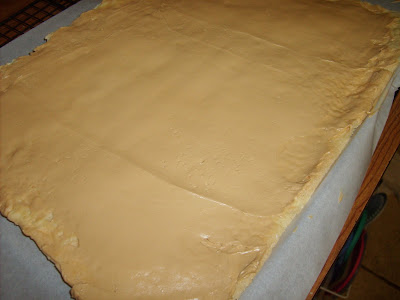

5. Use the parchment paper to help you roll the cake into a tight cylinder.
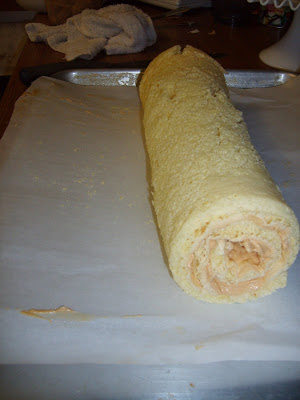

6. Transfer back to the baking sheet and refrigerate for several hours.

Shamelessly showing you the inside of my NEW refrigerator!!! 🙂

(which has since died as of 2016)

7. Unwrap the cake. Trim the ends on the diagonal, starting the cuts about 2 inches away from each end.
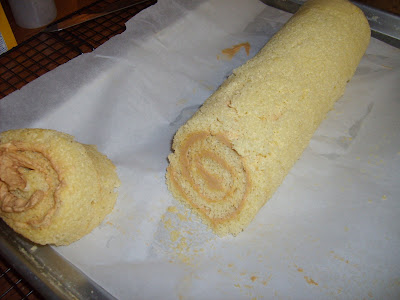
8. Position the larger cut piece on each log about 2/3 across the top.

9. Cover the log with the reserved buttercream, making sure to curve around the protruding stump.
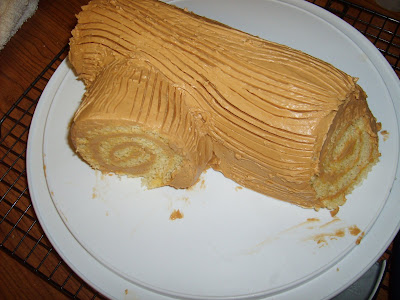
10. Streak the buttercream with a fork or decorating comb to resemble bark.
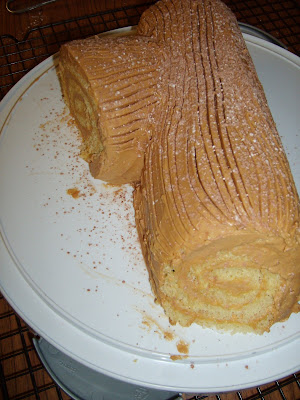
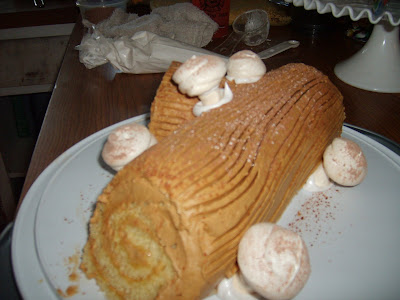
11. Transfer the log to a platter and decorate with your mushrooms and whatever other decorations you’ve chosen.

Meringue Mushrooms:

3 large egg whites, at room temperature
¼ teaspoon cream of tartar
½ cup (3-1/2 ounces/105 g.) granulated sugar
1/3 cup (1-1/3 ounces/40 g.) icing sugar
Unsweetened cocoa powder for dusting

1. Preheat the oven to 225 degrees F. Line 2 baking sheets with parchment. Have ready a pastry bag fitted with a small (no. 6) plain tip. In a bowl, using a mixer on medium-low speed, beat together the egg whites and cream of tartar until very foamy. Slowly add the granulated sugar while beating. Increase the speed to high and beat until soft peaks form when the beaters are lifted. Continue until the whites hold stiff, shiny peaks. Sift the icing sugar over the whites and, using a rubber spatula, fold in until well blended.

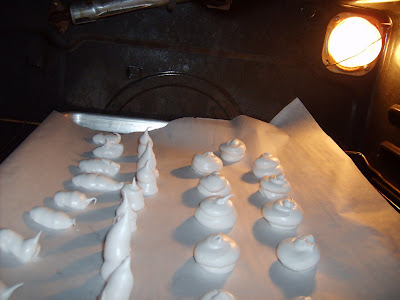
2. Scoop the mixture into the bag. On one baking sheet, pipe 48 stems, each ½ inch (12 mm.) wide at the base and tapering off to a point at the top, ¾ inch (2 cm.) tall, and spaced about ½ inch (12 mm.) apart. On the other sheet, pipe 48 mounds for the tops, each about 1-1/4 inches (3 cm.) wide and ¾ inch (2 cm.) high, also spaced ½ inch (12 mm.) apart. With a damp fingertip, gently smooth any pointy tips. Dust with cocoa. Reserve the remaining meringue.

3. Bake until dry and firm enough to lift off the paper, 50-55 minutes. Set the pans on the counter and turn the mounds flat side up. With the tip of a knife, carefully make a small hole in the flat side of each mound. Pipe small dabs of the remaining meringue into the holes and insert the stems tip first. Return to the oven until completely dry, about 15 minutes longer. Let cool completely on the sheets.
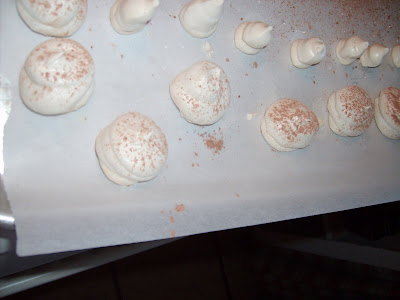
4. Garnish your Yule Log with the mushrooms.
Nigella’s Sticky Gingerbread


60cd3-nigellachristmas

I often take this to holiday gatherings at church.  I never have any leftover!  LOL  This is another one from the Nigella Christmas Cookbook…  here is the link online for you… Sticky Gingerbread recipe (metric measures). It is FANTASTIC!!!  It also freezes well so you can make it ahead.

Here are my results with it….

It was really moist and sticky!  You might need a fork.

The crumb is so lovely in this one!

Ok, are you ready for the recipe?  This is the US measurements version…

Sticky Gingerbread

Adapted from Nigella Christmas

Ingredients:

1 cup plus 3 tablespoons of butter

3/4 cup dark corn syrup

3/4 cup molasses

2/3 cup packed soft dark brown sugar

2 teaspoons finely grated ginger

1 teaspoon ground ginger

1 teaspoon ground cinnamon

1/4 teaspoon ground cloves

1 teaspoon baking soda dissolved in 2 tablespoons warm water

1 cup whole milk

2 eggs, beaten to mix

2 cups all-purpose flour

Directions:

Preheat the oven to 350ºF and line a roasting pan or ovenproof dish (approx. 12 x 8 x 2-inches) with aluminum foil or parchment paper (if using foil, grease it too).

In a saucepan, melt the butter over a lowish heat along with the sugar, syrup, molasses, fresh and ground gingers, cinnamon and cloves.

Take off the heat, and add the milk, eggs and dissolved baking soda in its water.

Measure the flour into a bowl and pour in the liquid ingredients, beating until well mixed. It will be a very liquid batter, so don’t worry. This is part of what makes it sticky later.

Pour it into the prepared pan and bake for 45–60 minutes until risen and firm on top. Try not to overcook, as it is nicer a little stickier, and anyway will carry on cooking as it cools.

Transfer the pan to a wire rack and let the gingerbread cool in the pan before cutting into 20 squares, or however you wish to slice it.

Optional: Combine 1 1/4 cups confectioners’ sugar with 1 tablespoon lemon juice, and one tablespoon of water. Then spread over the top of the cold slab of gingerbread. You can also add a light dusting of confectioners’ sugar.

I cut it and had it on trays in serving sizes for a Caroling Party we had a few years ago.

You won’t be able to stop at one serving, though… nope!

gingerbreadcake